
Residential elevator installation is a multi-stage home accessibility project that can involve planning, measurements, structural preparation, electrical work, elevator equipment, safety systems, testing, and final inspection. The exact process depends on the elevator type, number of floors, available space, and whether the elevator is being added to an existing home or planned during new construction.
If you are considering a home elevator, understanding what happens before, during, and after installation can make the project easier to plan.
Residential Elevator Installation — What Should You Expect?
Residential elevator installation typically begins with a professional home assessment and ends with testing, homeowner training, and project handover. Depending on the home and elevator system, the process may include design, structural preparation, electrical work, shaft or enclosure construction, equipment installation, and inspections. Existing homes can require more preparation than new construction, so your installer should provide a project-specific timeline.
What Is Residential Elevator Installation?
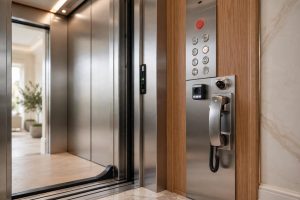
A residential elevator provides floor-to-floor transportation inside a private home. Unlike a commercial elevator designed for heavy public traffic, a residential system is typically selected around the home’s layout, the number of floors served, available space, accessibility requirements, and the homeowner’s intended use.
A home elevator can provide convenient access between floors for people with mobility limitations and, depending on its design and dimensions, may accommodate a wheelchair, multiple passengers, or household items.
What Does Residential Elevator Installation Include?
A complete project can include:
- Home and site assessment
- Measurements and space planning
- Elevator selection
- Structural preparation
- Shaft or enclosure construction where required
- Electrical work
- Guide rails and drive equipment
- Cabin and doors
- Controls and safety systems
- Testing and commissioning
- Homeowner demonstration
- Warranty and maintenance information
The elevator equipment itself is only one part of the installation.
How Does Residential Elevator Installation Work?
Step 1: Home Assessment
The installer evaluates the property to determine where the elevator can be located. This may include measuring available floor space, ceiling height, landings, floor structure, entry points, and the distance between floors.
For wheelchair accessibility, cabin dimensions, door clearance, landing space, and control placement also need to be considered.
Step 2: Choose the Residential Elevator
The appropriate system depends on the home’s requirements. Important considerations include elevator type, capacity, number of stops, cabin size, door configuration, drive system, available space, and desired finishes.
Step 3: Finalize the Installation Plan
Once the equipment is selected, the installer can finalize measurements and determine construction, electrical, structural, and landing requirements.
Step 4: Prepare the Home
Depending on the project, preparation can include framing, floor openings, shaft or enclosure construction, electrical work, structural modifications, and preparation of walls and flooring.
Step 5: Install the Elevator Equipment
The installation team installs the elevator’s major components, which can include guide systems, drive equipment, cabin, doors, controls, wiring, and safety equipment.
Step 6: Test and Commission the Elevator
Before the elevator is turned over to the homeowner, the system should be tested for proper travel, leveling, door operation, controls, and applicable safety functions.
Residential Elevator Installation Timeline — What Happens Week by Week?
The following is a general planning example, not a guaranteed eight-week installation schedule. Some projects can move faster, while custom installations, major renovations, permitting, inspections, equipment availability, and unexpected construction issues can extend the timeline.
Week 1 — Home Assessment and Measurements
The installer evaluates the home, measures the proposed elevator location, reviews accessibility needs, and identifies potential structural or electrical requirements.
Week 2 — Elevator Selection and Project Planning
The homeowner and installer finalize the elevator type, capacity, cabin dimensions, number of stops, door configuration, and design preferences.
Week 3 — Final Design, Engineering and Ordering
Final measurements and equipment specifications are confirmed. The installer coordinates engineering requirements, orders equipment, and establishes the construction schedule.
Week 4 — Construction Preparation Begins
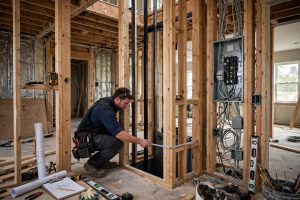
Construction may begin with framing, shaft or enclosure preparation, floor openings, electrical preparation, landing work, and required structural modifications.
Week 5 — Elevator Installation
The elevator equipment arrives or is brought into the prepared installation area. Guide systems, drive components, cabin components, doors, and controls begin to be installed.
Week 6 — Electrical, Controls and Safety Systems
Electrical connections, controls, door systems, safety components, and applicable emergency systems are completed and integrated.
Week 7 — Testing and Adjustments
The elevator is operated repeatedly to verify travel, leveling, door operation, controls, and safety functions. Adjustments and troubleshooting are completed as necessary.
Week 8 — Final Inspection, Demonstration and Handover
Where required, inspections are completed. The installer demonstrates operation, provides operating information, explains maintenance requirements, and reviews warranty documentation.
Important: Eight weeks should not be treated as a universal residential elevator installation timeline. The actual schedule must come from the installer after assessing the property and selected elevator.
How Long Does Residential Elevator Installation Take?
The installation timeline varies considerably. An existing home may require demolition, framing, structural modifications, electrical upgrades, flooring repairs, and other remodeling work before the elevator can be installed.
New construction can make the process easier because the elevator location, shaft, floor openings, electrical requirements, and structural components can be incorporated into the home’s original plans.
Potential delays can include permitting, inspections, equipment availability, custom components, material delivery, structural surprises, and construction delays.
Residential Elevator Installation Requirements
Space Requirements
The required footprint depends on the elevator model and cabin dimensions. Consider the cabin, doors, landing areas, shaft or enclosure, overhead clearance, and equipment requirements.
Structural Requirements
Some installations require floor openings, structural support, framing, or shaft construction. Existing homes may require additional work to accommodate these requirements.
Electrical Requirements
Electrical requirements vary by elevator system. The project may require dedicated circuits, wiring, controls, lighting, and emergency-related systems.
Accessibility Requirements
If wheelchair accessibility is important, discuss wheelchair dimensions, door width, cabin size, landing clearance, controls, and entry configuration before selecting the elevator.
Permits and Inspections
Permitting and inspection requirements vary by jurisdiction and project. Your residential elevator contractor should identify the applicable requirements and explain who is responsible for handling them.
Residential Elevator Installation Cost
The total cost of residential elevator installation depends on much more than the elevator equipment itself.
Major cost factors can include:
- Elevator equipment
- Number of floors and stops
- Shaft or enclosure
- Structural modifications
- Electrical work
- Construction labor
- Interior finishes
- Doors and controls
- Permits and inspections
- Installation labor
- Future maintenance
An existing home can require additional remodeling because the elevator must be integrated into a structure that was not originally designed around one.
For that reason, homeowners should request a written installed-price estimate rather than comparing equipment prices alone.
Residential Elevator Installation Comparison
| Installation Factor | Existing Home | New Construction |
|---|---|---|
| Planning | More complex | Easier to integrate |
| Structural work | May be substantial | Can be planned early |
| Electrical work | May require modifications | Planned during construction |
| Interior disruption | Potentially higher | Usually easier to coordinate |
| Design flexibility | Depends on existing layout | Greater |
| Installation coordination | More complicated | Easier to coordinate |
Residential Elevator Installation vs Stairlift
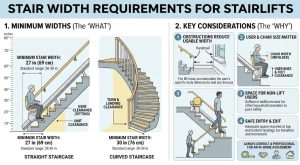
A stairlift may be a simpler option when one person primarily needs assistance traveling along an existing staircase. It generally requires less construction and can often be installed more quickly.
A residential elevator can provide broader floor-to-floor accessibility and may be more appropriate when wheelchair access, multiple users, multiple floors, or transporting household items are important considerations.
The right choice depends on the home’s layout and the user’s current and future accessibility needs.
How to Prepare Your Home for Residential Elevator Installation
Before work begins:
- Clear furniture and belongings from the installation area.
- Discuss construction access with the installer.
- Confirm electrical requirements.
- Protect floors and furnishings.
- Review the expected construction schedule.
- Plan for temporary disruption.
- Confirm applicable inspection and completion requirements.
Ask your installer which areas of the home will be inaccessible during each stage.
How to Plan a Residential Elevator Installation Step by Step
Step 1: Identify Why You Need an Elevator
Determine whether the primary goal is wheelchair accessibility, easier floor-to-floor movement, aging in place, carrying items, or broader household accessibility.
Step 2: Determine Which Floors Need Access
Identify the floors that must be connected and how many stops the elevator will require.
Step 3: Evaluate Available Space
Consider the elevator footprint, cabin, doors, landings, shaft requirements, and overhead clearance.
Step 4: Schedule a Home Assessment
Have a qualified installer evaluate the property before choosing equipment.
Step 5: Compare Elevator Options
Compare elevator types, capacities, dimensions, controls, finishes, and accessibility features.
Step 6: Review the Complete Installation Cost
Request a written quote covering equipment, construction, electrical work, labor, permits, and other applicable costs.
Step 7: Finalize the Design and Construction Plan
Confirm the elevator location, specifications, finishes, construction requirements, and project schedule.
Step 8: Prepare the Home
Complete required structural, electrical, framing, and construction preparation.
Step 9: Complete Elevator Installation
The installation team installs the equipment and connects the elevator’s operating and safety systems.
Step 10: Test, Inspect and Learn to Operate the Elevator
Complete testing and applicable inspections, then receive a demonstration of proper operation and maintenance.
What Should You Ask Before Starting a Residential Elevator Installation?
Before signing a contract, ask:
- What is the complete installed cost?
- What construction work is included?
- How long is the expected installation?
- Will structural modifications be required?
- Who handles permits?
- What electrical work is necessary?
- How much space does the system require?
- Is it wheelchair accessible?
- What weight capacity is available?
- What warranty is included?
- What maintenance is required?
- Who handles future repairs?
- What happens if construction takes longer than expected?
A detailed written quote should make these responsibilities clear.
Residential Elevator Installation FAQs
How long does residential elevator installation take?
There is no universal installation time. The schedule depends on the elevator type, home layout, structural preparation, electrical work, customization, permitting, inspections, and whether the project is part of new construction or a renovation.
How much does residential elevator installation cost?
The total cost varies based on the elevator system, number of stops, construction requirements, structural modifications, electrical work, labor, finishes, and permits. Equipment price alone does not represent the complete installed cost.
Can a residential elevator be installed in an existing home?
Yes, a residential elevator can be installed in an existing home when the property can accommodate the required equipment, space, structural work, and access between floors. A professional home assessment is necessary to determine feasibility.
Does a residential elevator require a shaft?
It depends on the elevator system. Some residential elevators use a shaft or enclosure, while other designs have different installation requirements. The selected equipment determines the exact space and construction requirements.
How much space is needed for a residential elevator?
Space requirements vary by elevator type, cabin dimensions, door configuration, number of floors, and installation design. The installer should provide the exact footprint and clearance requirements for the selected system.
Do residential elevators require permits?
Permit and inspection requirements vary by local jurisdiction and project. Your installer or contractor should identify the requirements that apply to your installation.
Can a residential elevator accommodate a wheelchair?
Many residential elevators can be designed for wheelchair accessibility, but the cabin size, door width, landing clearance, weight capacity, and configuration must be appropriate for the intended user.
What happens during the first week of elevator installation?
The first week may involve the home assessment, measurements, planning, and preparation. If construction has already been completed, the project may instead begin with equipment installation. The exact sequence depends on the project.
What happens after residential elevator installation?
After installation, the elevator is tested and adjusted, applicable inspections are completed, and the homeowner receives operating instructions. The installer should also explain warranty coverage, maintenance, and service procedures.
Residential Elevator Installation Maintenance After Completion
Installation is only the beginning of the elevator’s service life. Follow the manufacturer’s maintenance recommendations and any applicable inspection requirements.
Regular service can include checking operating components, doors, controls, safety systems, and other equipment. Homeowners should also know who to contact if the elevator stops operating properly.
Professional service is particularly important for safety-related equipment and systems that require specialized knowledge.
Conclusion — Planning a Residential Elevator Installation
Residential elevator installation is a significant home accessibility project that requires much more than simply delivering an elevator and connecting it to the home. The process can involve assessment, design, structural preparation, electrical work, equipment installation, testing, inspection, and homeowner training.
The week-by-week timeline provides a useful planning framework, but every project is different. Existing homes may require substantially more preparation, while new construction can make elevator integration easier.
Before choosing a system, evaluate your available space, accessibility requirements, number of floors, long-term needs, and complete installed cost. Then get a detailed written proposal from a qualified residential elevator installation company.
The best first step is a professional home assessment that can determine what type of elevator will work, what construction is required, how long the project may take, and what the complete installation will involve.